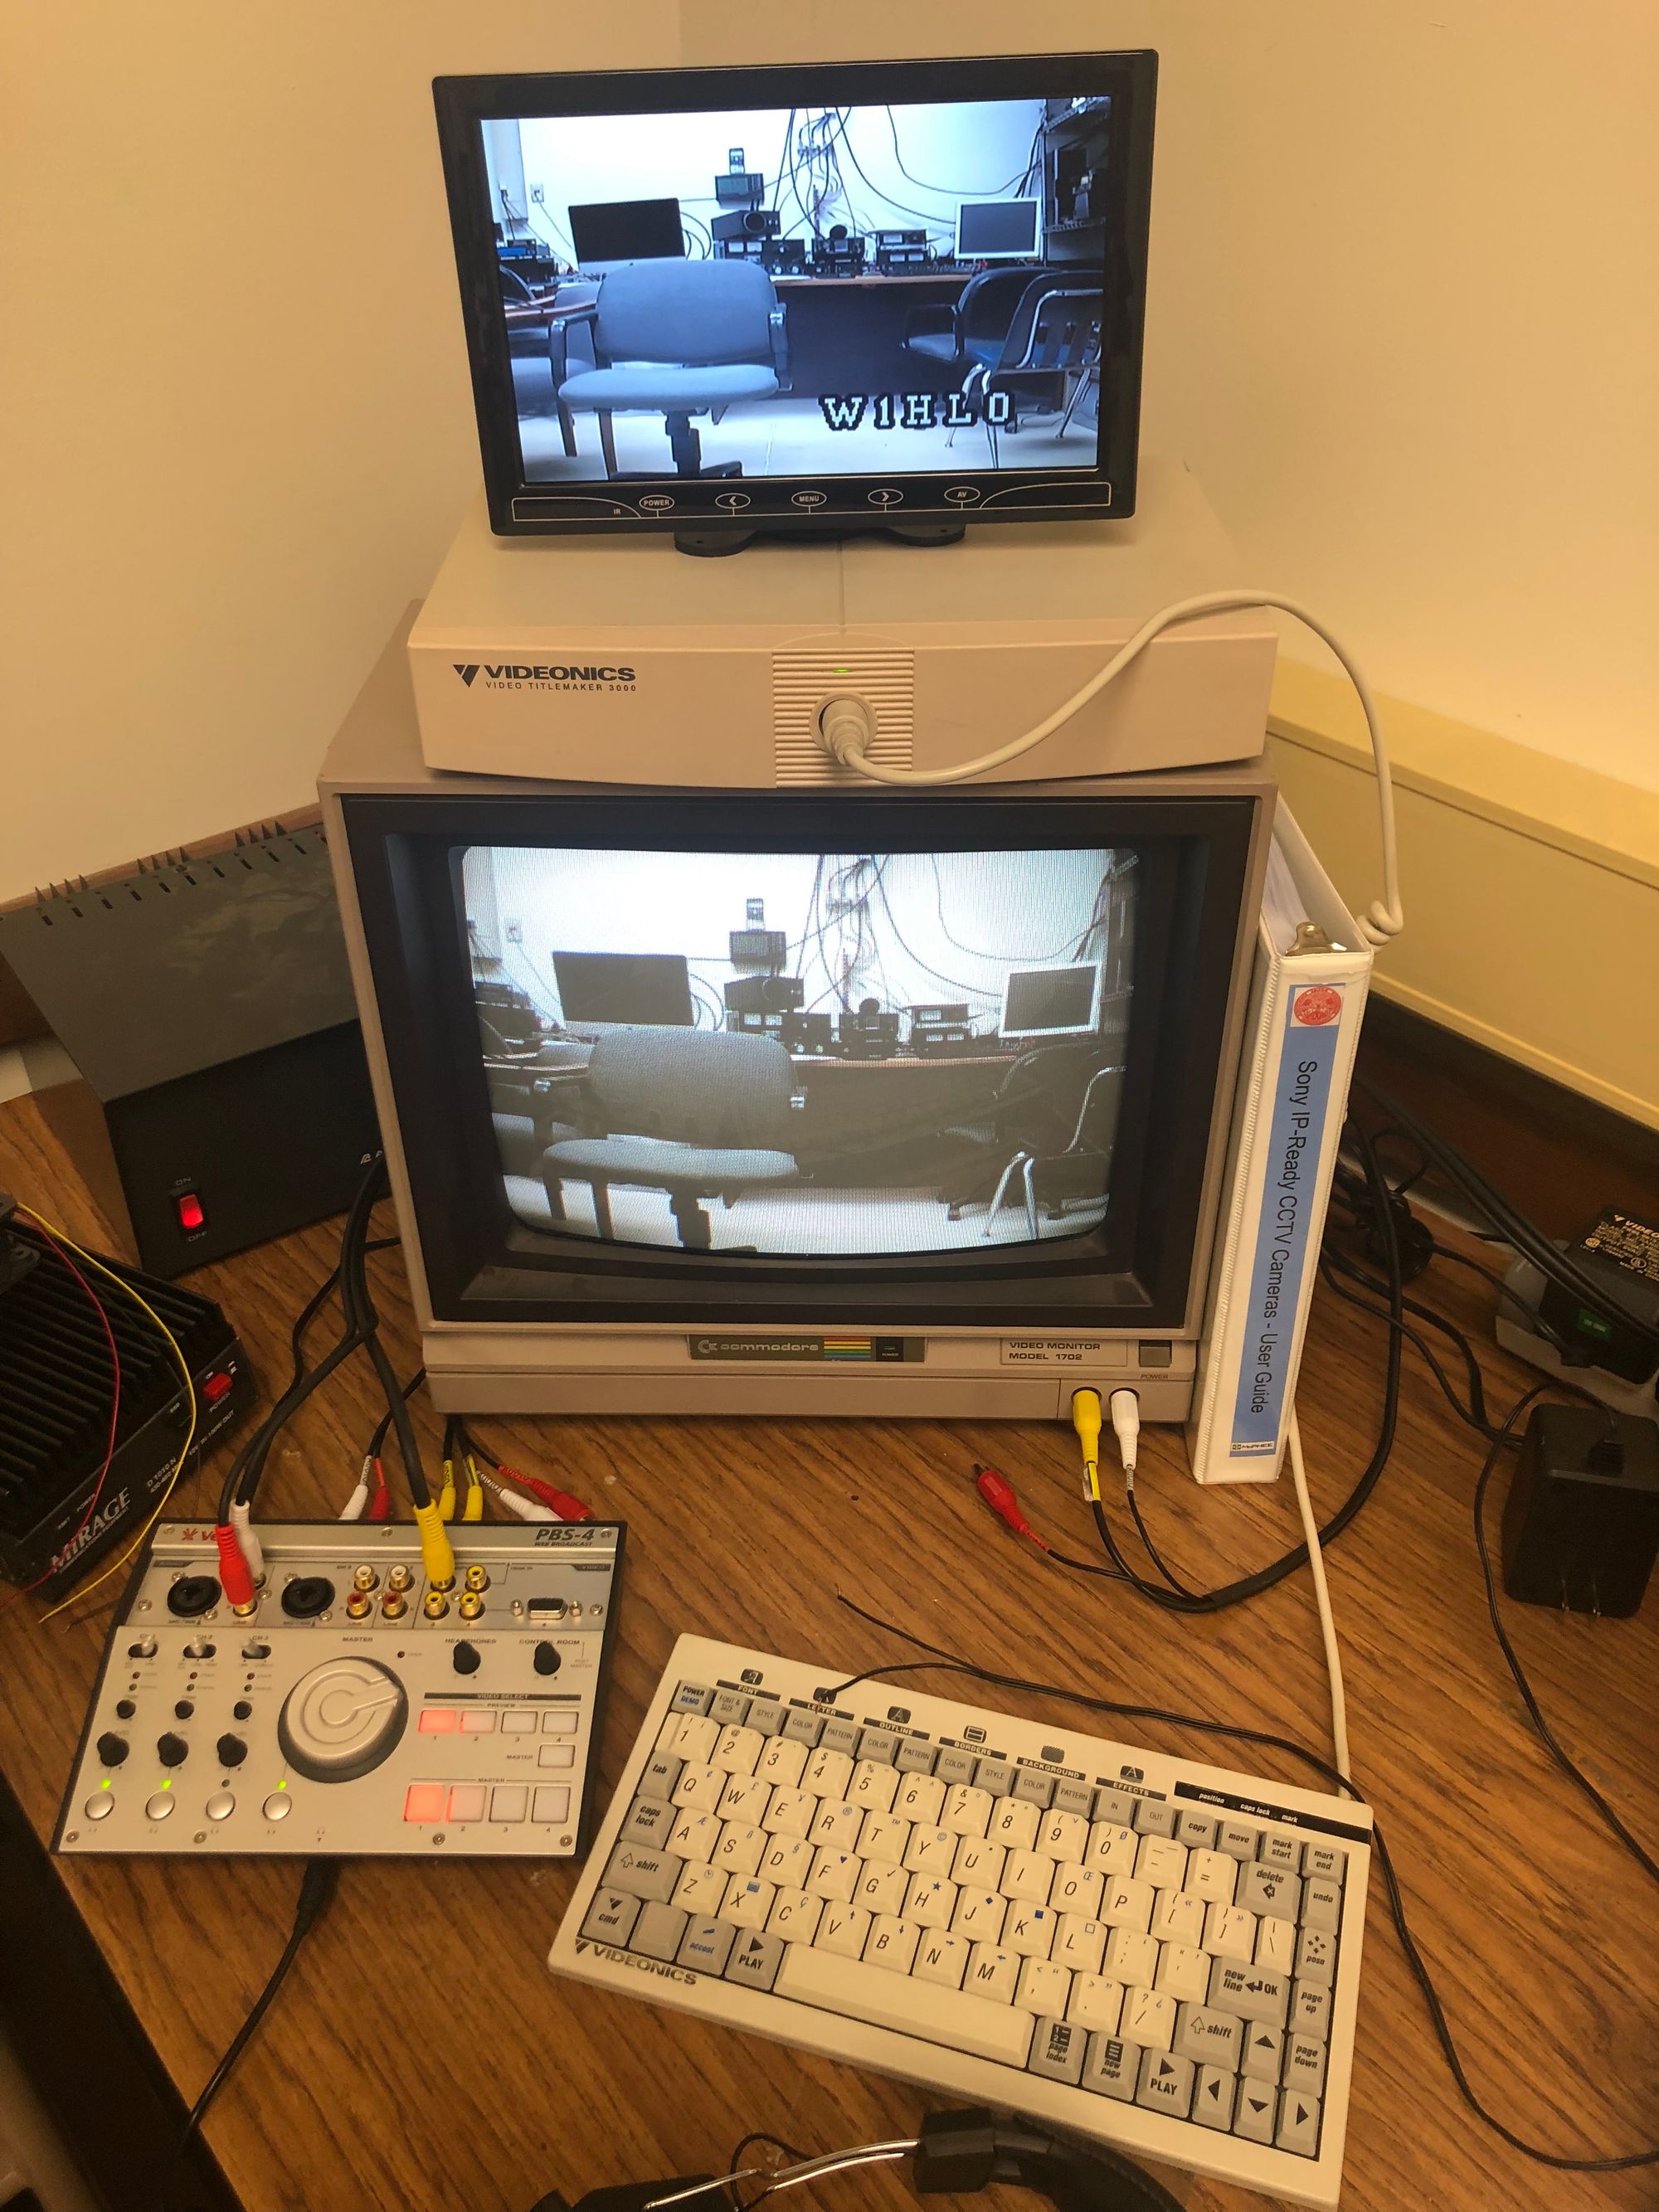
ATV: A Mix of the Old and New

With all the analog amateur television (ATV) receivers out there that are free or a few bucks (i.e., tube-type TVs), it's a no-brainer to experiment with ATV as an amateur radio project. To receive ATV signals, students can build yagi antennas and hook them up to an analog, standard definition (SD) TV. (These antennas work just fine for picking up HD broadcasts for other channels, too.)
To broadcast an analog TV signal, a little more is needed. An MFJ-8709 with a CPU heat sink (using an adequate amount of thermal paste) will provide around 4W of transmitting power. While the heat sink is not needed for extremely low power output on the MFJ-8709, I highly recommend it to ensure longer life and higher power output. The MFJ-8709 can get hot very quickly!
The MFJ-8709 has an SMA connector, so you will need to adapt this to your antenna system. At W1HLO, we are using a Jetstream JTP1B dual band antenna that is 11.7dB on UHF for transmitting. To get more power output with your ATV transmission, you can use the Mirage D-1010-ATVN amplifier.
As we use a couple of studio cameras with composite video outputs, we use a Vestax PBS-4 audio/video mixer that we purchased used online. Any audio/video mixer will do – we like the PBS-4 because it provides a preview output so that we can see what's on each camera before selecting a camera as a source. To put our callsign on the video as a text overlay during transmission, we picked up a used Videonics Titlemaker 3000. This allows us to use different fonts and position the text anywhere on the screen. For the preview monitors (both for the PBS-4 and the Titlemaker), we are using an old Commodore 1702 composite video monitor and a TOGUARD 7" display.

Students that live nearby and built the ATV yagi can now receive our broadcast. However, what about those students that can't receive the broadcast over the air? Now it's time to mix in the new – stream the broadcast over YouTube!
To do a live stream over YouTube with a Mac, we needed to purchase a capture device that the YouTube web-based streaming app will recognize on a Mac. The Blackmagic UltraStudio Mini Recorder allows for an HDMI input and uses a Thunderbolt connector on a Mac. This capture device is also recognized by OBS as well, if you choose to use OBS instead of the YouTube live stream client.
To receive the ATV broadcast, we are using an old VCR with a cable tuner built-in. We connected one of our student's ATV yagi antennas to the "Antenna In" of the VCR. As the VCR has composite video and audio out, we connected those outputs via RCA cables to a composite-to-HDMI converter/upscaler. Then, we could feed the converted audio/video signal via HDMI to the Blackmagic UltraStudio Mini Recorder for streaming the video on YouTube. In this manner, we could get a real, over-the-air ATV broadcast on the Internet in all its fuzzy glory!
